
Ah, the allure of those salon-perfect curls! We’ve all left the hairdresser, strutted our stuff down the sidewalk, flicking our freshly-curled locks, feeling a touch like runway models (even if our runway is just the grocery store aisle). But, let’s be honest—regular salon visits can make our wallets feel, well, a tad under the weather.
Personalized tips for: How to Achieve Salon-Quality Curls at Home
Add a few details to get tailored advice alongside this article. It’s quick and free.
What if I told you there’s a way to get those enviable, bouncy curls without stepping out of your home? And without burning a hole in your pocket! Yep, achieving that salon-quality flair in the cozy comfort of your abode is not only possible but also downright cost-effective. Grab your combs, ladies and gents, because we’re about to embark on a curly journey sans the salon price tag.
Understanding Your Hair Type
Every masterpiece starts with understanding the canvas, and in the world of hair, your canvas is your hair type. While curling might seem as simple as wrapping strands around a heated rod, knowing your hair type can be the difference between “meh” curls and “OMG, did you just step out of a shampoo ad?” curls.
The Great Hair Type Chart
- 1a to 1c (Straight Hair)
- 1a: Stick-straight and fine. Think of that sleek, glossy sheet of hair that doesn’t hold curls easily.
- 1b: Mostly straight but with a slight body wave. A tad more texture than 1a.
- 1c: Straight with some bends and kinks. The most rebellious of the straight hair types.
- 2a to 2c (Wavy Hair)
- 2a: Gentle, tousled waves. The laid-back beachy vibe.
- 2b: More pronounced S-shaped waves. Think surfer vibes but make it fashion.
- 2c: Deep waves with the occasional spiral curl. This hair type has a mind of its own.
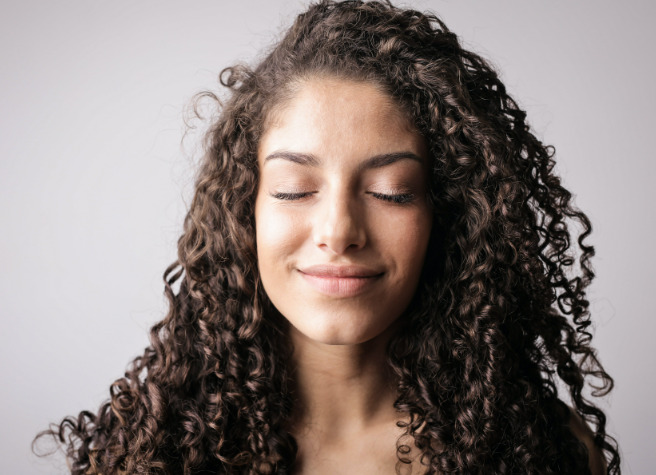
- 3a to 3c (Curly Hair)
- 3a: Big, loose spiral curls. The “I woke up like this” glam.
- 3b: Bouncy, springy ringlets. Shirley Temple, but grown up.
- 3c: Tight, corkscrew curls. Coils that love to party together.
- 4a to 4c (Coily/Kinky Hair)
- 4a: Soft, dense, and defined coils. Think spiral notebook springs.
- 4b: Z-shaped kinks with less defined pattern. Wild and free.
- 4c: Tight kinks with a high density. A beautiful maze that’s often moisture-thirsty.
Essential Tools for Curling Hair at Home
Ah, the toolkit of a hair connoisseur! Before you dive into the world of curls, waves, and spirals, it’s essential to arm yourself with the right artillery. These tools don’t just make the process easier; they’re the key to achieving those salon-worthy curls you’re aiming for.
Curling Irons/Wands:
A wand, but not the Harry Potter kind – though, they are magical in their own right.
- Barrel Sizes and Their Curls:
- Tiny Barrel (around 3/8”): Perfect for tight, corkscrew curls. Channel your inner 80s pop star.
- Medium Barrel (around 1”): Versatile and popular, creates those classic, bouncy curls.
- Large Barrel (1.5” and up): Loose, romantic waves fit for a beach or a ballroom.
- Clamp vs. No-Clamp Irons:
- Clamp Irons: Hold the hair in place while you curl. Ideal for silky smooth finishes. (P.S. Watch out for those crimps!)
- No-Clamp (Wand): Requires you to manually wrap the hair. Offers more freedom and natural-looking results. (P.S. Wand-wielders, use that heat-resistant glove!)
Hair Rollers:
The old-school heroes that never went out of style.
- Hot Rollers vs. Traditional Rollers:
- Hot Rollers: Electrically heated, set curls faster. Perfect for the modern busy-bee who’s always on-the-go.
- Traditional Rollers: No heat required. Your grandmother’s secret to overnight, damage-free curls.
- Choosing the Right Size:
- Small: Tight curls, big volume.
- Medium: Classic curls and body.
- Large: Soft waves, minimal curl.
Hairdryers and Diffusers:
Transform your hair game with the power of air.
- Enhancing Natural Curls: A diffuser attachment disperses the dryer’s airflow, reducing frizz and enhancing your hair’s natural curl or wave. Think of it as a gentle wind tousling your hair, not a hurricane!
Hair Clips and Sectioning Tools:
Every artist needs a clean canvas.
- The Art of Sectioning: Breaking your hair into sections ensures even heat distribution and uniform curls. Hair clips help keep the rest of your hair out of the way while you work on each section. It’s all about strategy, darling!
Heat Protection Gear:
Because safety (and hair health) first!
- Gloves: Many curling wands come with a heat-resistant glove to protect your hand. If not, invest in one. Your fingers will thank you.
- Protective Sprays: A shield against heat damage. Spray generously before applying heat, ensuring your locks stay lush and lustrous.
Hair Prep is Essential
If hair curling was a royal ball, then hair prep would be the fairy godmother, sprinkling her magic before the grand entrance. Because even Cinderella needed a little prep before dazzling the crowd, right? So, let’s delve into the magic potion ingredients of hair prep.
Washing and Conditioning:
Turning your hair from a parched desert to a tropical oasis.
- Using Sulfate-Free Shampoos:
- Why? Sulfates can be a tad too harsh, stripping hair of its natural oils. Using sulfate-free shampoos ensures your hair remains hydrated, which is essential for healthy curls. Imagine them as the gentle whisper to sulfates’ rock concert.
- The Majesty of Moisturizing Conditioners:
- Hydration Nation: Curls thirst for moisture. A moisturizing conditioner quenches this thirst, giving you soft, manageable, and bouncy curls.
- Slip and Slide: Moisturizing conditioners also offer ‘slip’, making detangling a breeze. Less breakage, more groove!
Hair Protectants:
Your hair’s knight in shining armor against the dragon called Heat.
- Types of Protectants and Their Importance:
- Sprays: Lightweight and versatile, ideal for all hair types. Like a sunblock, but for your locks.
- Creams: Offers a thicker barrier, perfect for coarser hair types that might engage in a tug-of-war with heat.
- Serums: These silky elixirs not only protect but also add shine. Turn up the gloss factor!
Priming with Products:
Think of these as the base coat before the final artwork.
- Mousse:
- Volume Galore: Want to add some oomph to your curls? A dollop of mousse can lift your hair from the roots, giving it body and structure.
- Curl Memory: Helps in retaining the curl shape for a longer duration.
- Curl-Enhancing Creams:
- Definition Divas: They help in defining each curl, making them pop. It’s like adding HD to your hair!
- Serums:
- Smooth Operators: Fight frizz and add that glossy magazine-cover finish. Your hair, but in ultra-HD.
The Curling Process
Drumroll, please! 🥁 We’ve prepped, primed, and now, it’s showtime. The main act. The pièce de résistance. Let’s journey through the mesmerizing world of turning straight strands into spiraled splendors.
Sectioning Your Hair:
Because strategy matters, even in hair curling.
- Divide and Conquer: Start by parting your hair down the middle, from the forehead to the nape. You should now have two big sections.
- The Quadrant Quest: Further, divide each of the two sections in half, horizontally, just above the ears. Now, you’re rocking four sections. Very geometric-chic!
- Secure the Sections: Use hair clips to hold the sections in place. Begin curling from the lower sections and work your way up. This ensures the top layers don’t interfere with the bottom ones.
- Sub-Sections for Precision: For each of the four main sections, grab 1-2 inch sub-sections for curling. This size usually works for most, but feel free to adjust based on the curl tightness you desire.
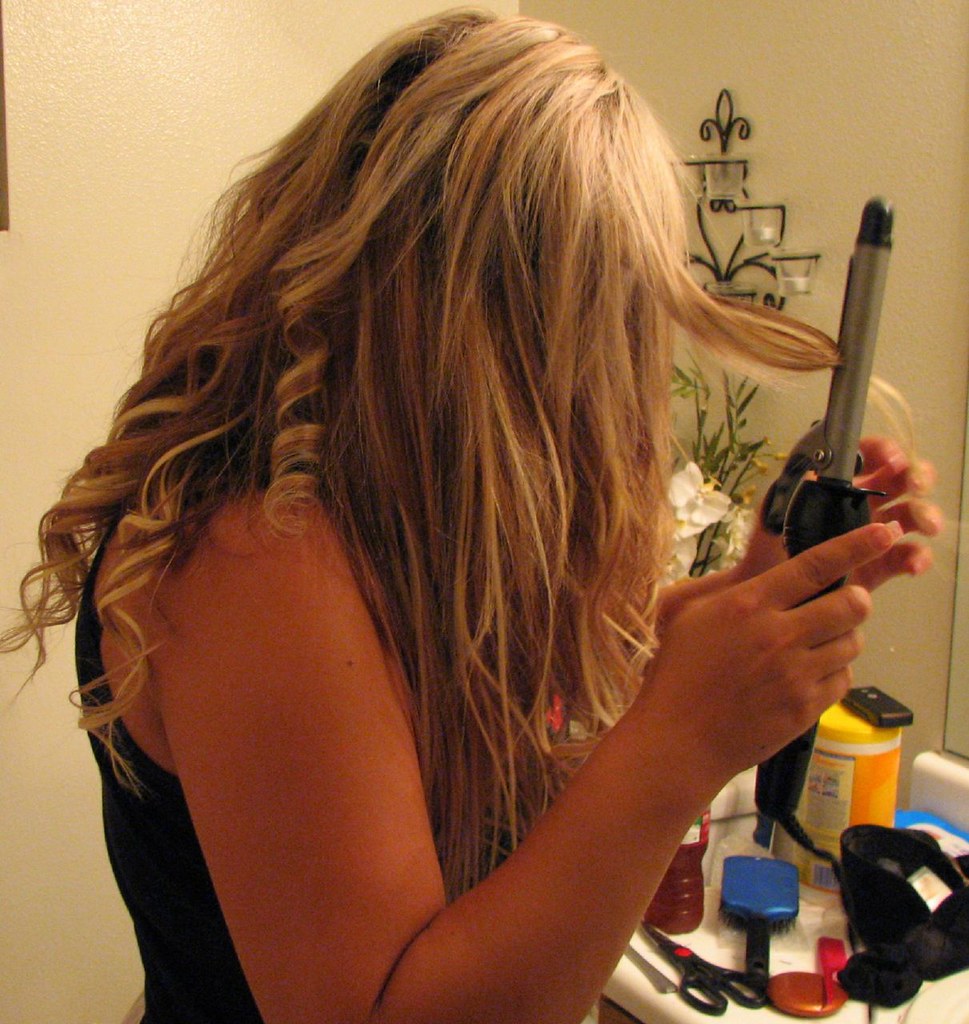
Using the Curling Tool:
Handle with flair, but also with care.
- Grip 101: Hold the curling iron or wand vertically for looser waves and horizontally for tighter, classic curls. For more casual, beachy waves, alternate between the two.
- To Clamp or Not: If using a clamp iron, start by clamping the mid-length of your hair, then wrap the remaining hair upwards. For wand users, manually wrap your hair, starting close to the root and spiraling down.
- Direction Matters: For a natural look, alternate between curling away from your face and towards it. For a more uniform, glam look, curl all sections in the same direction.
- Time Check: Generally, hold each curl for about 8-10 seconds. Fine hair may need less time, while coarse hair might demand a few extra seconds. But remember, don’t overdo it! You’re aiming for Cinderella, not a crispy critter.
Setting the Curls:
Lock in that artistry!
- Hairspray: Once you’ve curled all sections, give your head a generous misting. Choose a hairspray that matches your need: flexible hold for bouncy curls, or maximum hold for curls that last through a dance-off.
- Setting Spray: For those who want to keep things natural, a setting spray can offer a gentler hold, ensuring your curls stay put without feeling like a helmet.
Aftercare and Maintenance
So, you’ve spun your tresses into golden spirals. The applause is deafening. The selfies? Flawless. But wait, Cinderella didn’t just vanish after the ball, right? The after-party (or aftercare, in this case) is just as essential. Let’s glide through maintaining those gorgeous curls.
Sleeping with Curls:
Dreaming in curls without waking up to a nightmare.
- Silk or Satin Pillowcases: These aren’t just luxury items for royalty. They reduce friction, ensuring your curls don’t transform into a frizzy rebellion by morning. Plus, they’re kinder to your skin. Win-win!
- Hair Wraps: Think of them as cozy blankets for your curls. Wrapping your hair in a silk or satin scarf can protect your curls from the tossing and turning of your dream-filled adventures.
Refreshing Curls:
Because, sometimes, your curls just need a little pep talk.
- Water and Product Mixtures: No need for a full wash day. Fill a spray bottle with water, add a touch of leave-in conditioner or curl cream, shake well, and spritz onto your curls. Scrunch gently with your hands to revive and reshape. Voila, your curls bounce back into action!
Avoiding Damage:
Protecting your crown jewels.
- Limiting Heat Exposure: Even queens need a day off. Give your hair a break from the heat every now and then. Embrace its natural texture, experiment with braids, or rock a chic updo.
- Deep Conditioners: Consider them spa days for your locks. Regular deep conditioning sessions replenish moisture, ensuring your curls stay resilient and radiant. It’s like a tropical vacation, but for your hair.
Common Mistakes and How to Avoid Them
Alright, lovely folks, let’s chat errors. Because even the most seasoned curling connoisseurs sometimes trip over their royal robes. But worry not! With a little know-how, these pitfalls can be sidestepped with the grace of a ballroom dancer.
Overheating Hair:
The “too much of a good thing” syndrome.
- The Snafu: Setting your curling tool to the heat level of the sun’s core and then wondering why your locks resemble hay rather than silk.
- The Fix: Always start with a moderate temperature and adjust based on your hair’s thickness and health. Remember, your hair isn’t auditioning for a barbecue. Treat it kindly!
Curling Damp or Wet Hair:
A sizzling mistake.
- The Snafu: Jumping from the shower straight to the curler, then being puzzled by the steamy hiss and lackluster results.
- The Fix: Ensure your hair is completely dry before introducing it to any heated tool. If you hear a sizzle, abort mission! Dry hair fully. Your hair should curl, not cook.
Not Using Heat Protectant:
Skipping the armor in a battlefield.
- The Snafu: Applying direct heat without a protective barrier, much like going skiing without winter clothes.
- The Fix: Always, ALWAYS use a heat protectant before curling. It’s like the sunscreen of the hair world, shielding those precious strands from thermal trauma.
Not Letting Curls Set Before Brushing or Styling:
Impatience isn’t always a virtue.
- The Snafu: Rushing to brush out those fresh curls and ending up with a fluffy, undefined mane.
- The Fix: Once you’ve curled a section, let it cool down and set. This ensures the curl’s longevity and shape. Only after all sections are curled and cooled, can you then use your fingers or a wide-tooth comb to style and shape.
Comprehensive Q&A Block
Curls come with curiosity, and it’s only natural to have a whirlwind of questions spinning in your head. Let’s unravel some of those tangled queries.
Q: How often should I curl my hair to avoid damage?
A: Ah, moderation, the key to life and locks! While there’s no hard-and-fast rule, it’s wise to limit heat styling to 2-3 times a week. Make friends with heat protectants, and ensure you give your hair some off days. Think of it as a mini vacation for your tresses. 🏖️
Q: Why are my curls not holding?
A: The disappearing curl act can be due to various culprits. It could be the heavy products weighing down your hair, or perhaps your hair’s health is crying out for some TLC. It might also be your curling technique – remember to let those curls cool and set. Investing in a quality hairspray can be your safety net here.
Q: Can I curl chemically treated or colored hair?
A: Tread with caution, dear reader. While it’s not a complete no-no, chemically treated or colored hair is more vulnerable to damage. Always use a lower heat setting and never skip the heat protectant. And, of course, consult with your trusted hairstylist for personalized advice.
Q: How can I achieve beach waves instead of tight curls?
A: For those effortlessly chic, “I just emerged from the ocean” waves, opt for a larger barrel curling wand. Hold it vertically, and wrap larger sections of hair around it. Remember, the key is to be loose and relaxed, both in technique and spirit. 🌊
Q: My hair is very short. Can I still get salon-quality curls?
A: Absolutely! Short hair doesn’t mean short on style. Opt for a smaller barrel curling iron for more control. And here’s a tip: Curling in different directions can give more volume and a fun, edgy look.

There you have it, curl aficionados! The path to salon-quality curls right from the comfort of your boudoir. It’s a journey, one filled with waves, twirls, and occasional tangles. But with patience, practice, and a sprinkle of passion, you’re all set to turn heads and make those mirrors swoon. So, go forth and let those curls dance in the wind. Because, darling, every day is a good hair day when you’re the stylist!